This chapter covers the one-time and occasional work that makes daily operations possible: the product catalogue, tanks and pumps, the assignments that connect them, staff accounts, and organisation settings.
Who this chapter is for: organisation admins mainly; branch managers for the parts scoped to their branch.
Setting up in the right order
Kiwi's pieces depend on each other, so set them up in this order:
- Branches (under Branches, organisation admins only)
- Products enabled for the organisation, then for each branch
- Tanks, with calibration
- Pumps, assigned to tanks
- Prices (see the Pricing chapter)
- Staff accounts
Skipping a step shows up later as a blocked form: a delivery cannot be recorded without a tank assigned to the product, and a pump reading cannot be valued without a price.
Products and enablement
Open Products to see the catalogue.
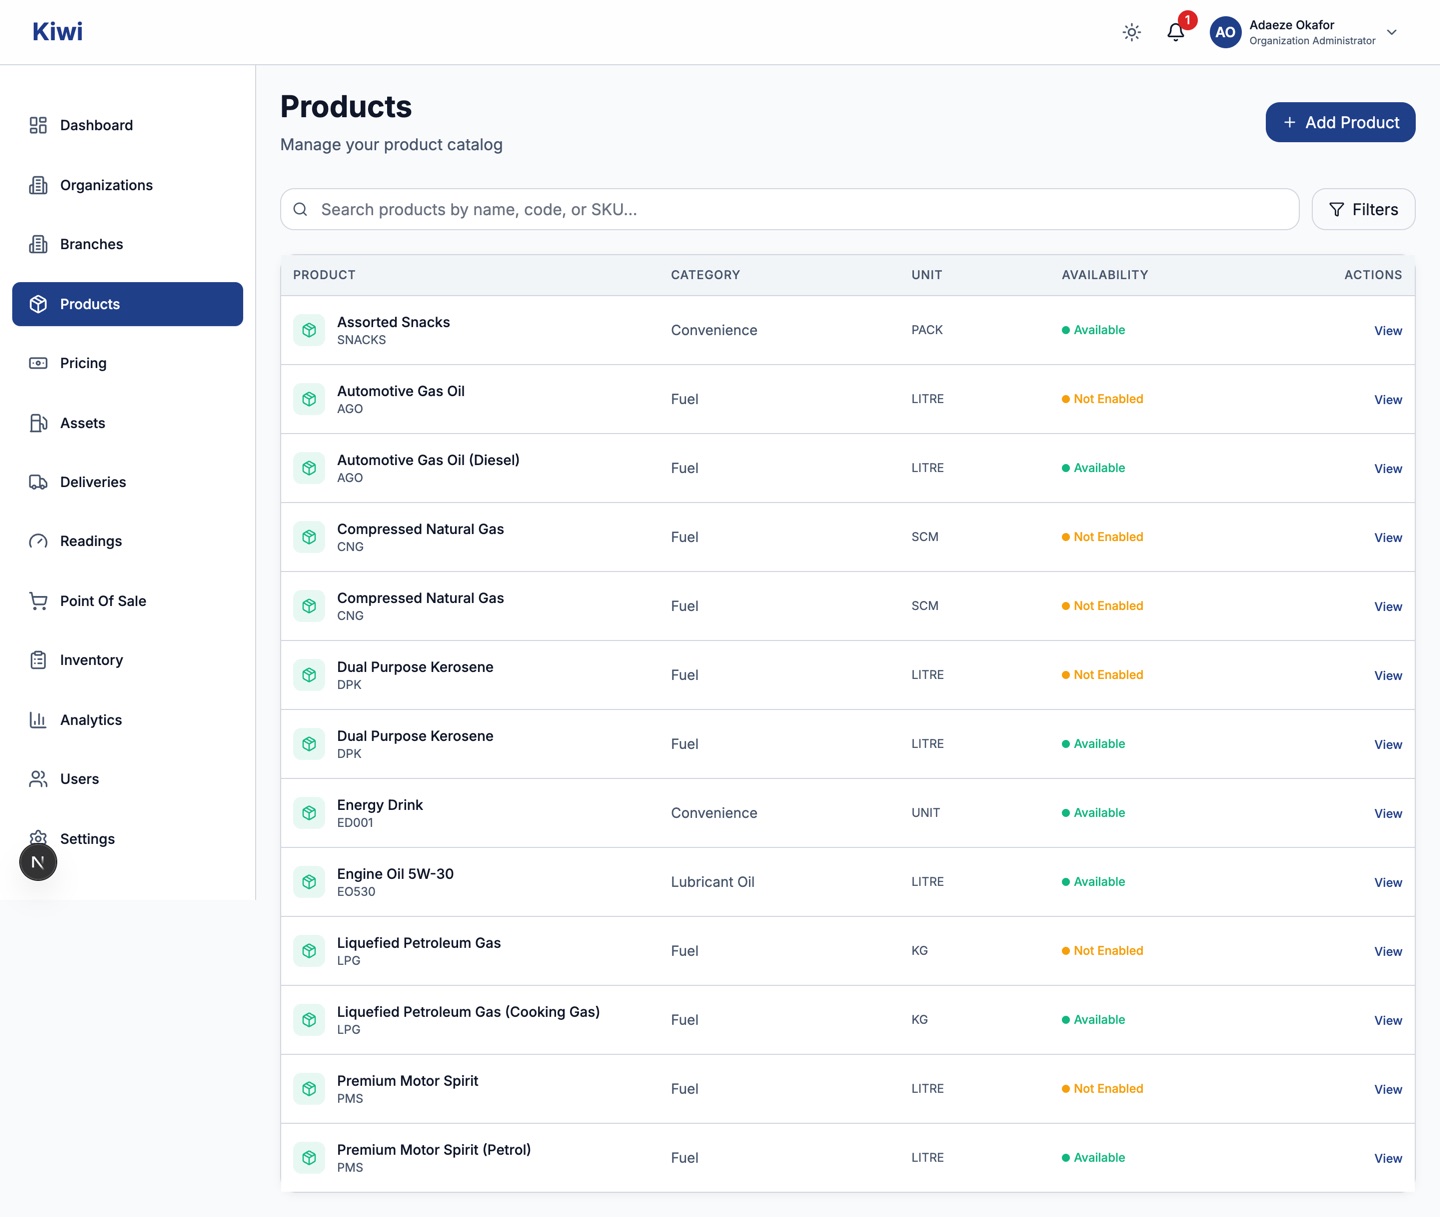
Products are shared definitions (name, code, category, unit); whether a branch actually sells one is controlled by enablement, which works in two layers:
- Organisation level: enable the product for your organisation on the Organization Products page, reachable from the product catalogue.
- Branch level: enable it for each branch that stocks it.
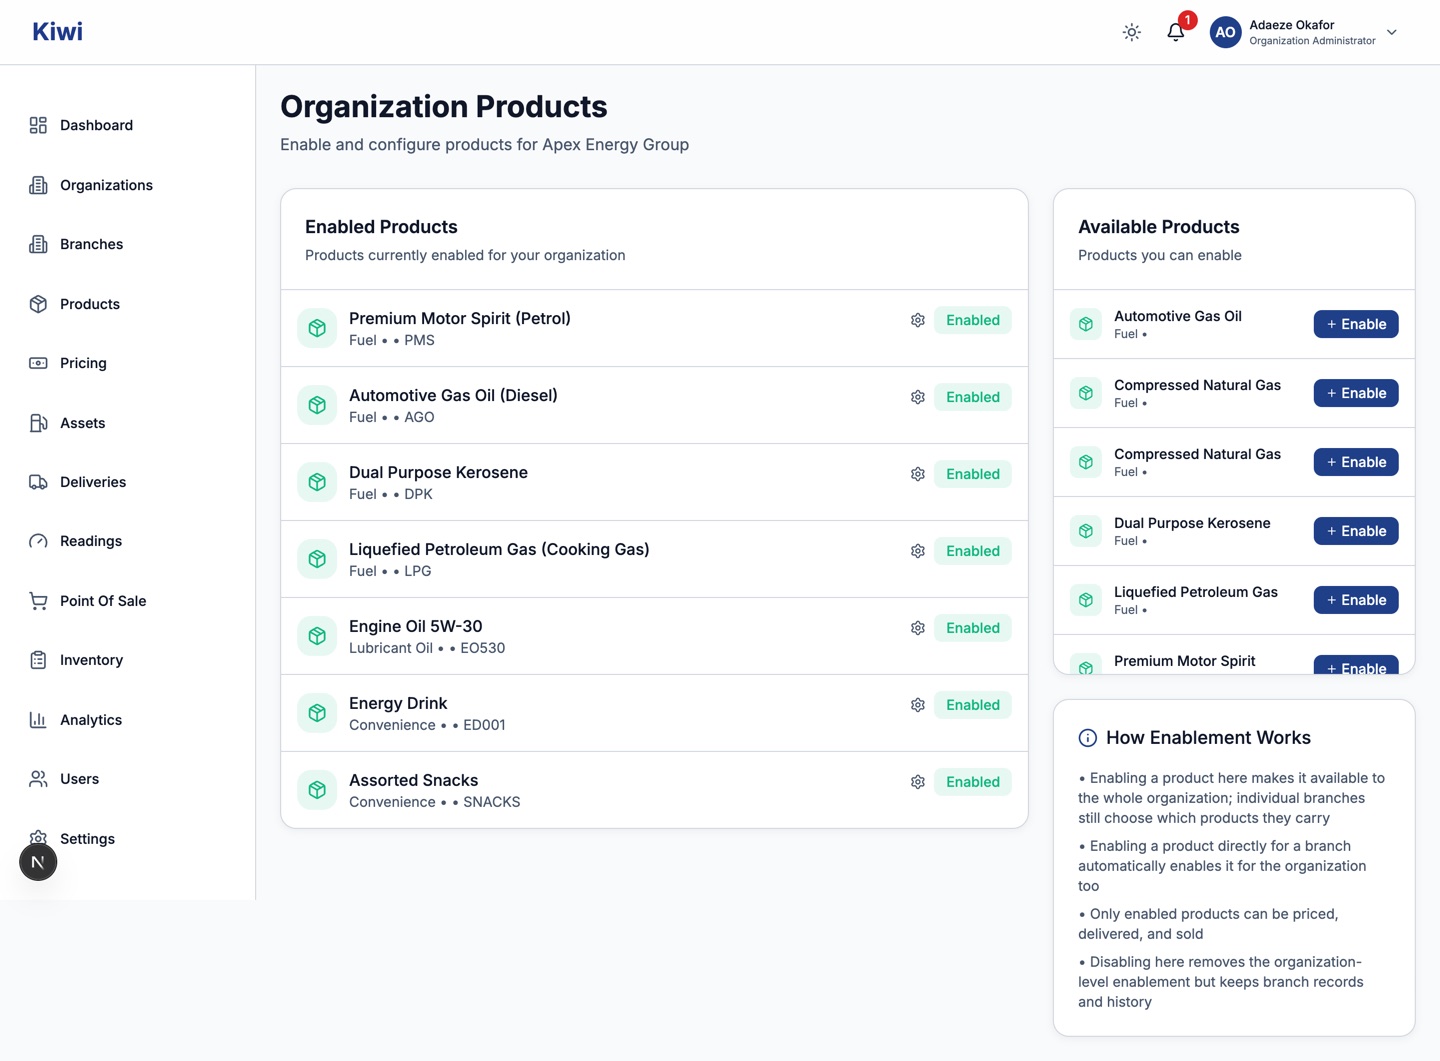
Only enabled products appear in delivery forms, pricing and inventory for that branch. If a product you expect is missing from a form, check its enablement before anything else.
New products are created from the Products page. Note that the fuel category is managed by the platform; organisations create their own non-fuel products (lubricants, gas, convenience items and so on).
Tanks and pumps
Open Assets for the equipment overview: total tanks and pumps, how many are calibrated, connected and actively read.
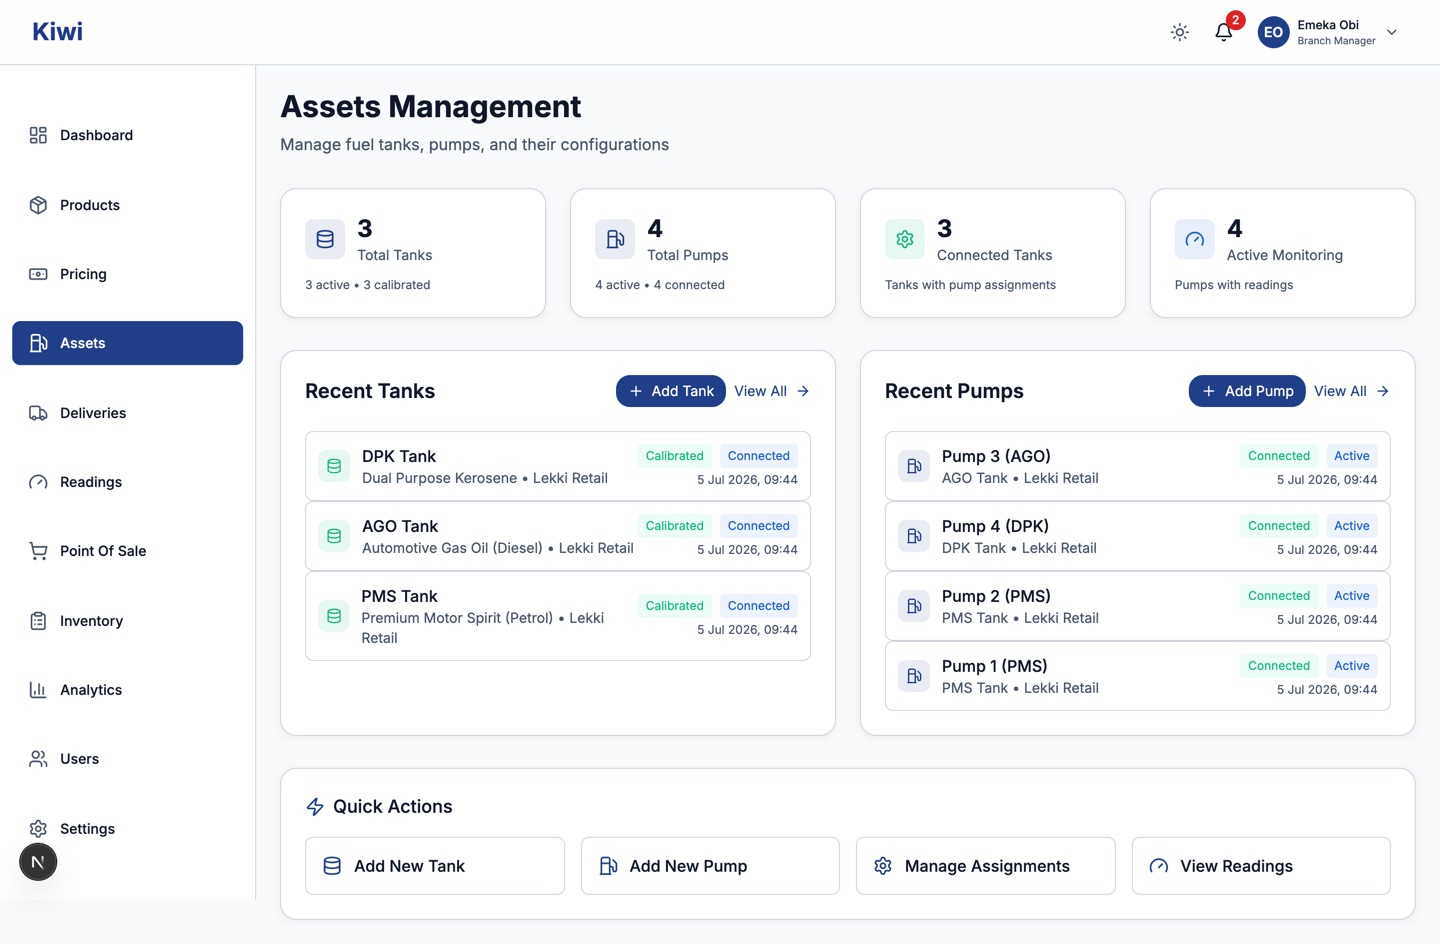
To add a tank, click Add Tank:
- Choose the branch and give the tank a clear name (for example "PMS Tank 1").
- Enter the Capacity in litres.
- Optionally set the Current Product now, with a note on why; you can also do this later under Assignments.
Calibrate the tank from its detail page before relying on its dip readings. Calibration maps fuel height to volume. You can upload calibration points from a CSV strapping chart, or generate a calibration curve from the tank's geometry (cylindrical or rectangular). Once calibrated, tank reading volumes are computed automatically from the height (see the Daily Operations chapter); until then, staff must enter volumes by hand.
To add a pump, click Add Pump: choose the branch, name the pump, record the Meter Serial, and assign it to the tank it draws from, with the date the assignment takes effect.
Assignments connect everything: pumps to tanks, and tanks to products. Manage them under Assets, then Manage Assignments. Keep them current when equipment is repurposed. An unassigned pump or tank dispenses untracked volume, which reconciliation flags as a configuration issue until it is fixed (see the Inventory chapter).
Staff accounts
Open Users to manage accounts.
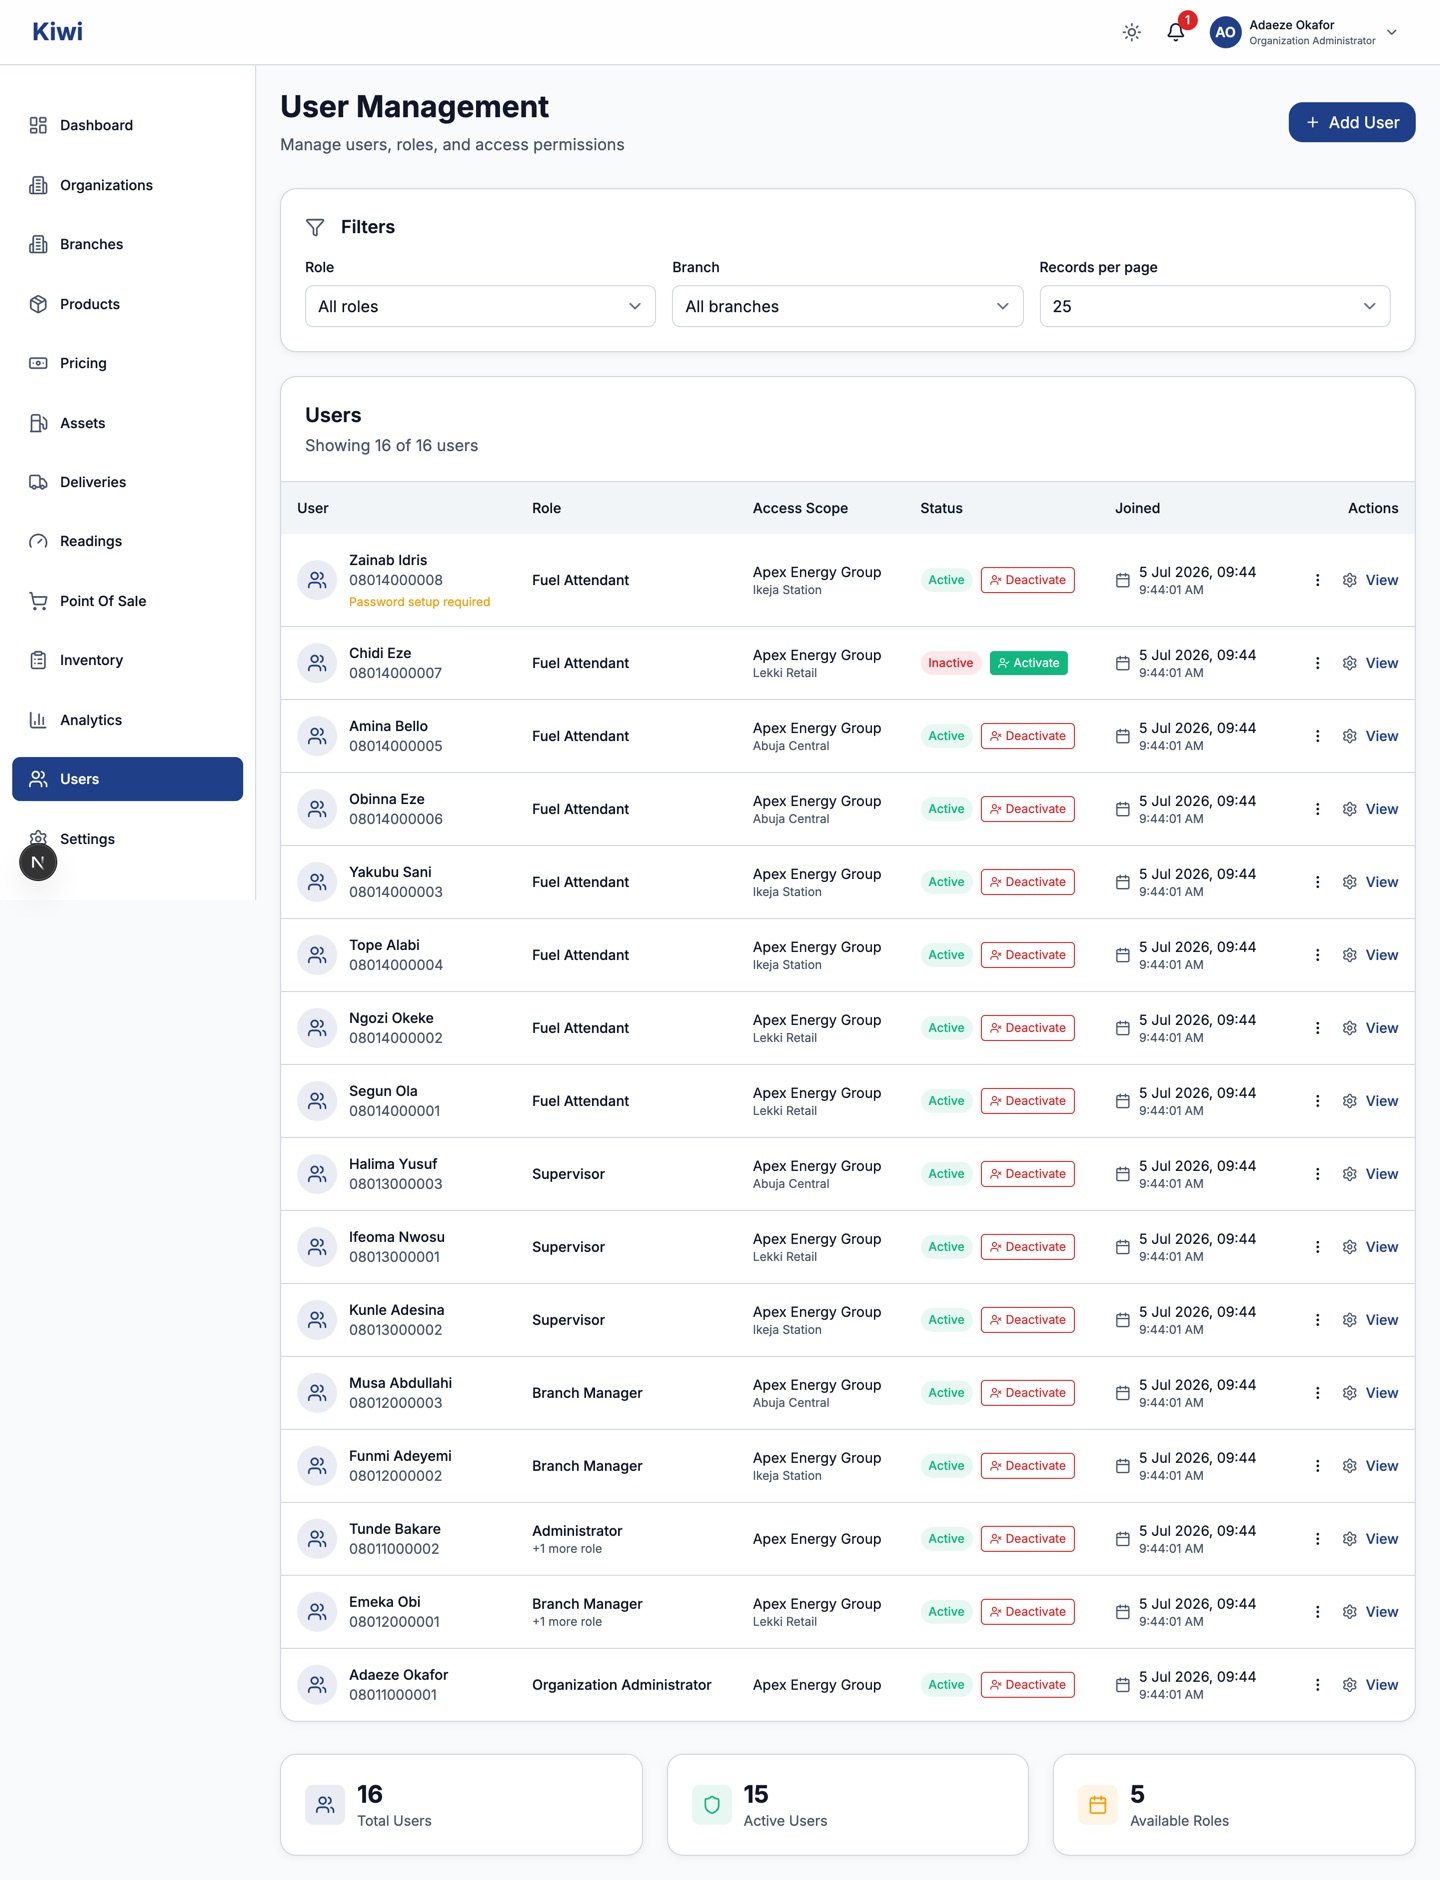
The list shows each user's role, access scope (organisation or branch), and status, with filters by role and branch. Deactivate blocks a user from signing in without deleting their history; Activate restores them.
To add a user, click + Add User:
- Enter their full name and phone number. The phone number is their login and cannot be changed later.
- Assign a role. Branch-level roles (attendant, supervisor, branch manager) also need a branch assignment. The Getting Started chapter describes what each role can do.
- Setting a password now is optional. Users without one create their own the first time they sign in with their phone number, which is the smoothest way to onboard staff.
Additional roles can be assigned later from the user's detail page; a person can, for example, be an administrator for the organisation and also manage a specific branch.
Password rules: branch managers and above can reset passwords, but only for staff within their own scope; branch-scoped managers can only manage users assigned to their branches.
Organisation settings
Open Settings. The tabs you see depend on your role.
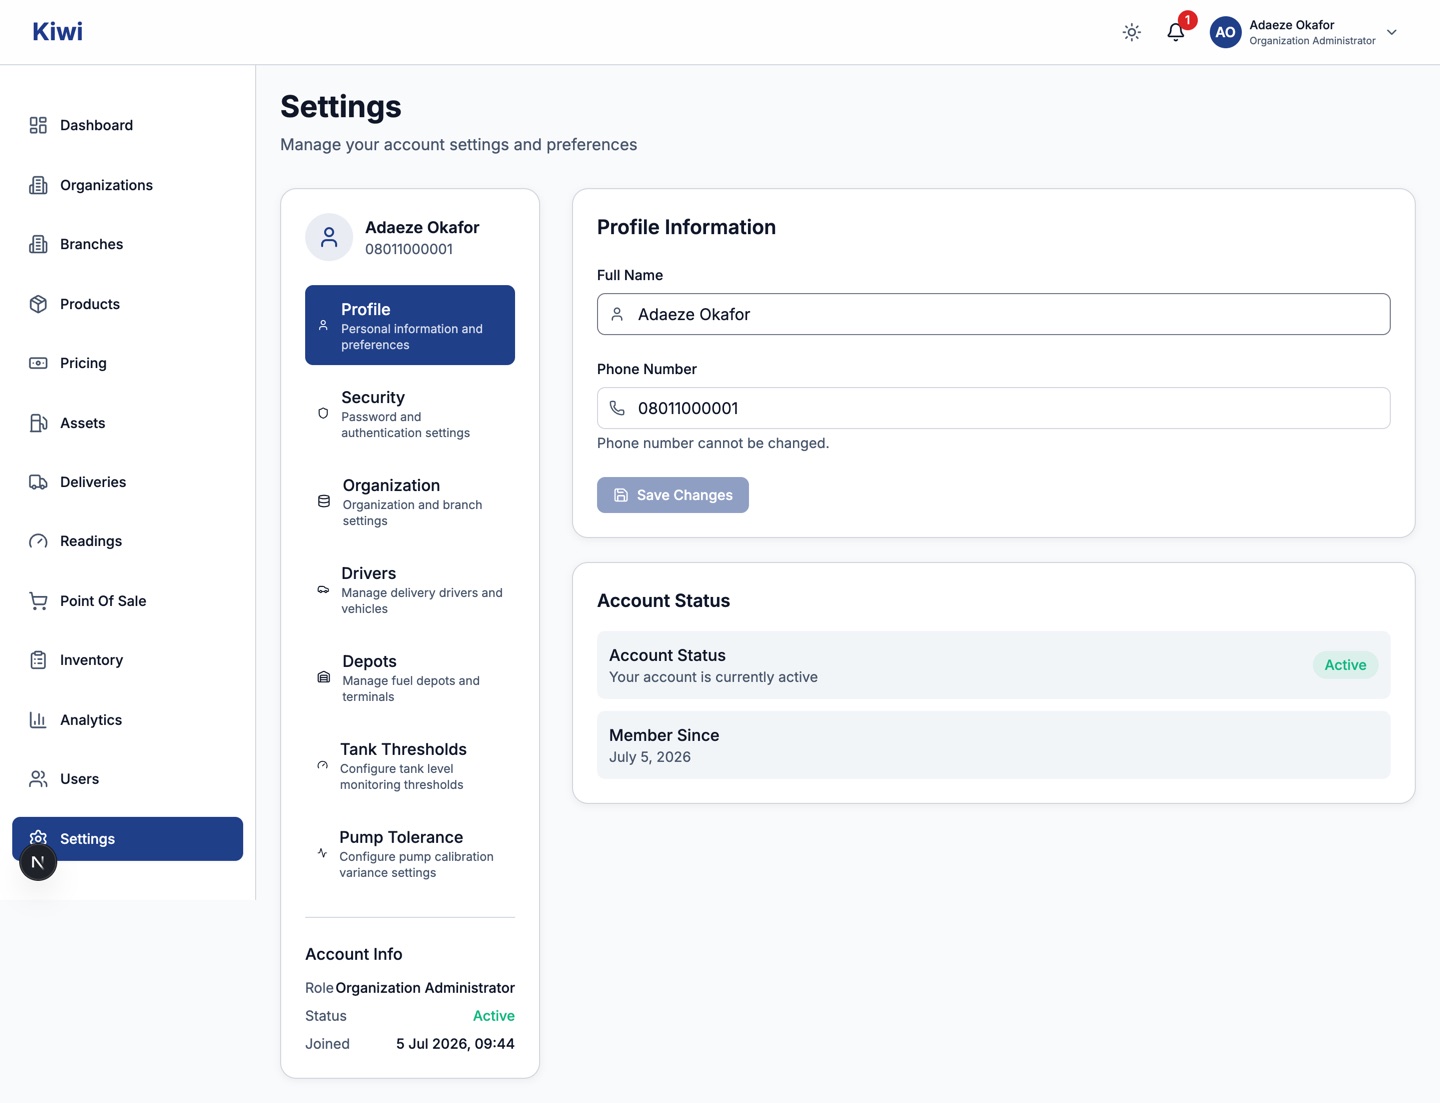
| Tab | What it holds |
|---|---|
| Profile | Your name; the phone number is shown but cannot be changed |
| Security | Your password |
| Organization | Your organisation and branch details, and your role assignments |
| Drivers | The delivery driver list (also maintainable from the delivery form) |
| Depots | Source depots for fuel deliveries |
| Tank Thresholds | The stock levels at which tanks show critical, low, medium or good. Set at branch level, falling back to organisation level, then system defaults |
| Pump Tolerance | Calibration variance allowances per pump, branch product or organisation product, used by reconciliation |
Organisation-level operational policies also live here: the tank reading schedule (expected reading times, acceptance windows, minimum gap between readings and grace periods, under Settings) and RTT limits (per-entry and daily caps on return-to-tank volumes). Platform-level settings, such as countries, VAT rates, fuel tax and system setup, are managed by the site administrator.
Quick reference
| Item | Rule |
|---|---|
| Enablement | Organisation first, then per branch; forms only offer enabled products |
| Tank calibration | CSV strapping chart or geometric curve; required for automatic dip volumes |
| Pump assignment | Every pump must point at a tank; every fuel tank at a product |
| Phone numbers | A user's login; unique and unchangeable |
| New user passwords | Optional at creation; users set their own at first sign-in |
| Deactivation | Reversible; blocks sign-in, keeps history |
| Thresholds and tolerance | Branch level overrides organisation level, which overrides system defaults |